LITECOIN BAMT VERSION 1.1 – EASY USB LINUX MINING DISTRO
With the recent price spike of crypto-currencies, many have begun showing interest in mining. But what is mining? And most importantly, what is crypto-currency? Basically, crypto-currency is a decentralized digital peer-to-peer currency used over internet and runs on the network of users that employ it. Litecoin is based off the concept of the ever growing Bitcoin.
Litecoin uses a scrypt based algorithm, unlike Bitcoin’s SHA-256.The scrypt algorithm is more reliant on memory, not processing efficiency. That is the reason those specialized hardwares developed for Bitcoin mining will not work with Litecoin and making GPU mining more effective. We will look at how to setup the BAMT Linux distro with USB bootable to get you started on mining Litecoin. Don’t be dissuaded if you have never used Linux before, our step by step tutorial makes it easy.
Litecoin BAMT – Linux mining distro setup
So you have made up your mind to use Linux for mining, which is a fine choice indeed. If you are still worried because you have never used Linux before, don’t be. Simply follow our step by step instruction and you will be fine. Your mining rig will be up and running soon.
Step 1 : What will you need
- A machine already built with a decent AMD GPU.
- A thumb drive, 2GB or larger.
You will also need a few files to get started, so let’s download them all here :
Password : rumorscity
Step 2 : Create USB bootable for BAMT
- Extract both of the files you have downloaded in Step 1.
- Install Win 32 Disk Imager.
- Launch Win 32 Disk Imager and write litecoinbamt1.1.img to a thumb drive (2GB and above)
You have just successfully created a bootable linux distro on the thumb drive. Next we will launch BAMT on your mining rig.
Step 3 : BIOS settings
Before we launch BAMT, make sure your mining computer’s BIOS settings are in order. Power on your computer, and press the delete key a few times immediately after power on. That should get you into the BIOS configuration area. Do the following settings, then save and exit:
- Change power options so that the computer automatically turns itself on whenever power is restored. The reason for this is to make sure that your miner automatically starts up after a power outage. Also it makes powering the computer on much easier if you don’t happen to have a power switch connected to the motherboard.
- Make sure that your USB drive is first in the boot-up order – you may need to have a thumb drive plugged in.
- Disable all components that you don’t plan to use to save a little bit of power. Since your miner will likely be running all the time, it will add up. For instance, disable the onboard audio, the SATA controller, the USB 3.0 ports if you only use a 2.0 thumb drive, the Firewire port, and the serial port.
Step 4 : Launch BAMT
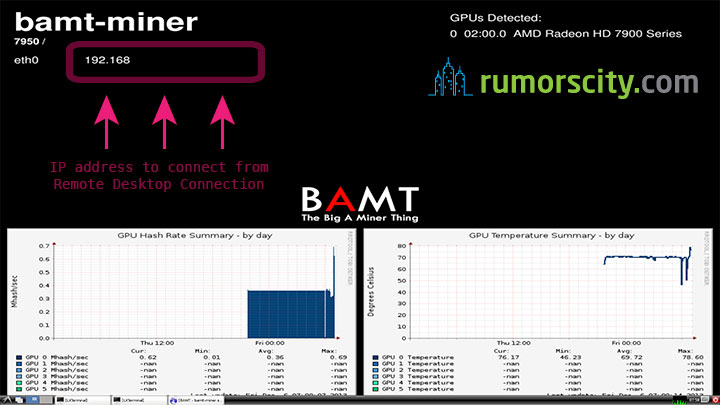
Insert the thumb drive into your mining rig then power it on. Once connected to BAMT, you will be able to see the IP from the BAMT desktop. From here on, you can connect to the mining rig using Remote Desktop Connection (or ssh) with the login :
- Username : user
- Password : live
Note : You can start the mining rig with the monitor unplugged and get the IP of your BAMT machine from your router’s client list or BAMT desktop.
Step 5 : Edit CGMiner script
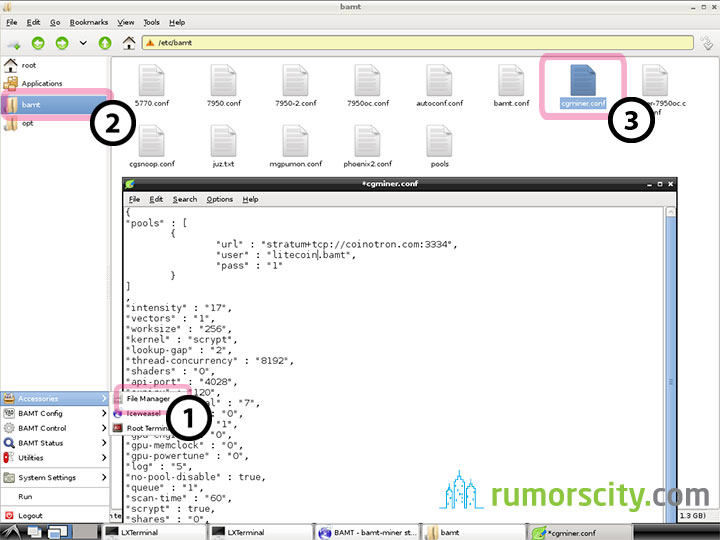
From the BAMT desktop (either at the mining rig or connected from Remote Desktop Connection), click on the Start button which is on the lower left corner similar to Windows. Then launch File Managerfrom Accessories. Look for the cgminer.conf file located at /etc/bamt/ to edit the CGMiner configurations.
There is another file in this folder, cgminer-7950oc.conf which i have included that have the settings for 7950 GPU for 620KHash/sec. Make sure to edit the pool entries to your own though.
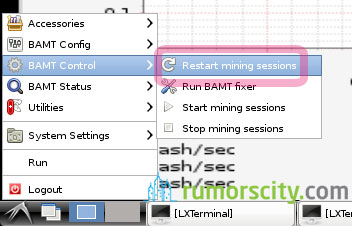
Save the new configuration file and click on Restart mining sessions for the new settings to take effect.
Step 6 : Connect to your mining rig
Congratulations, you have your own headless Linux Litecoin miner now. There are few methods to connect to your mining rig :
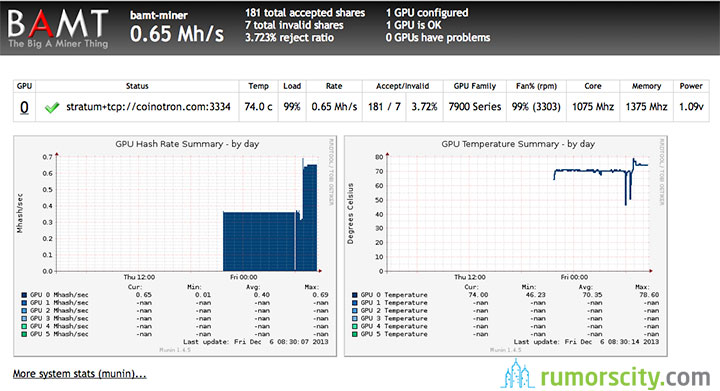
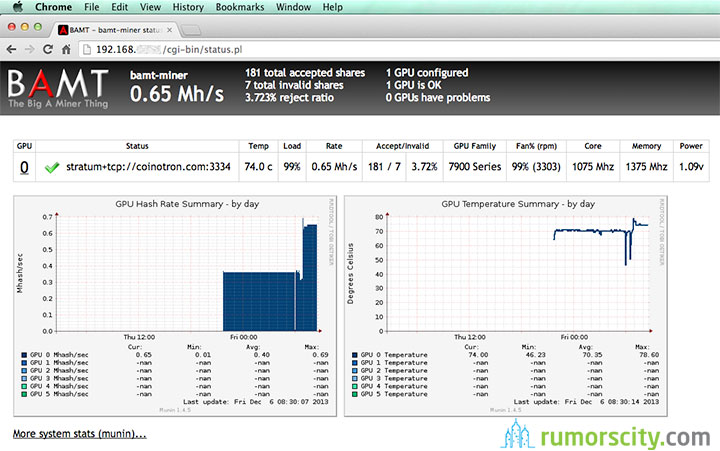
- Open browser and navigate to your BAMT IP address. You can see the hashrate, GPU temp, fan speed and some other statistics right from your browser.
- Connect to your mining rig from Remote Desktop Connection like you did in Step 4 if you need to configure your mining rig.
Step 7 : Optimized CGMiner config for Gigabyte WF3 7950
Here is my CGMiner configuration for Gigabyte WF3 7950. I am getting around 650KHash/sec on this setup without hardware errors. Temperatures are kept around 74°C with 99% fan speed and BIOS was flashed to F43 with voltage lowered to 1.09V.
1075/1375 core/memory clock speed
Thread Concurrency 40960
Workload 256
Threads per gpu 1
lookup gap 2
Intensity 20
Power Limit 20%
Thread Concurrency 40960
Workload 256
Threads per gpu 1
lookup gap 2
Intensity 20
Power Limit 20%
Coding for CGMiner :
cgminer –thread-concurrency 40960 –lookup-gap 2 –gpu-engine 1075 –gpu-memclock 1375 –gpu-powertune 20 -w 256 -I 20 -g 1
Security
By default, BAMT has remote desktop and ssh enabled with a public password. If you’re not using a router or firewall, change the default password before connecting to the internet with this distro.
No comments:
Post a Comment